KyoMio/dsh-zen-remote
dsh-zen-remote
dsh-zen-remote is a community DeepSeek Harness plugin. Read the repository README before installing.
Install
npx @deepseek-ai/dsh plugin --profile web add github:KyoMio/dsh-zen-remoteRestart `dsh web` after install. Bundle APIs can change during the developer preview.
README badge

[](https://dshhub.dev/plugins/dsh-zen-remote)Paste this into your README. The star count updates with every catalog sync.
From the README
Excerpt from KyoMio/dsh-zen-remote, cleaned of badges and images.
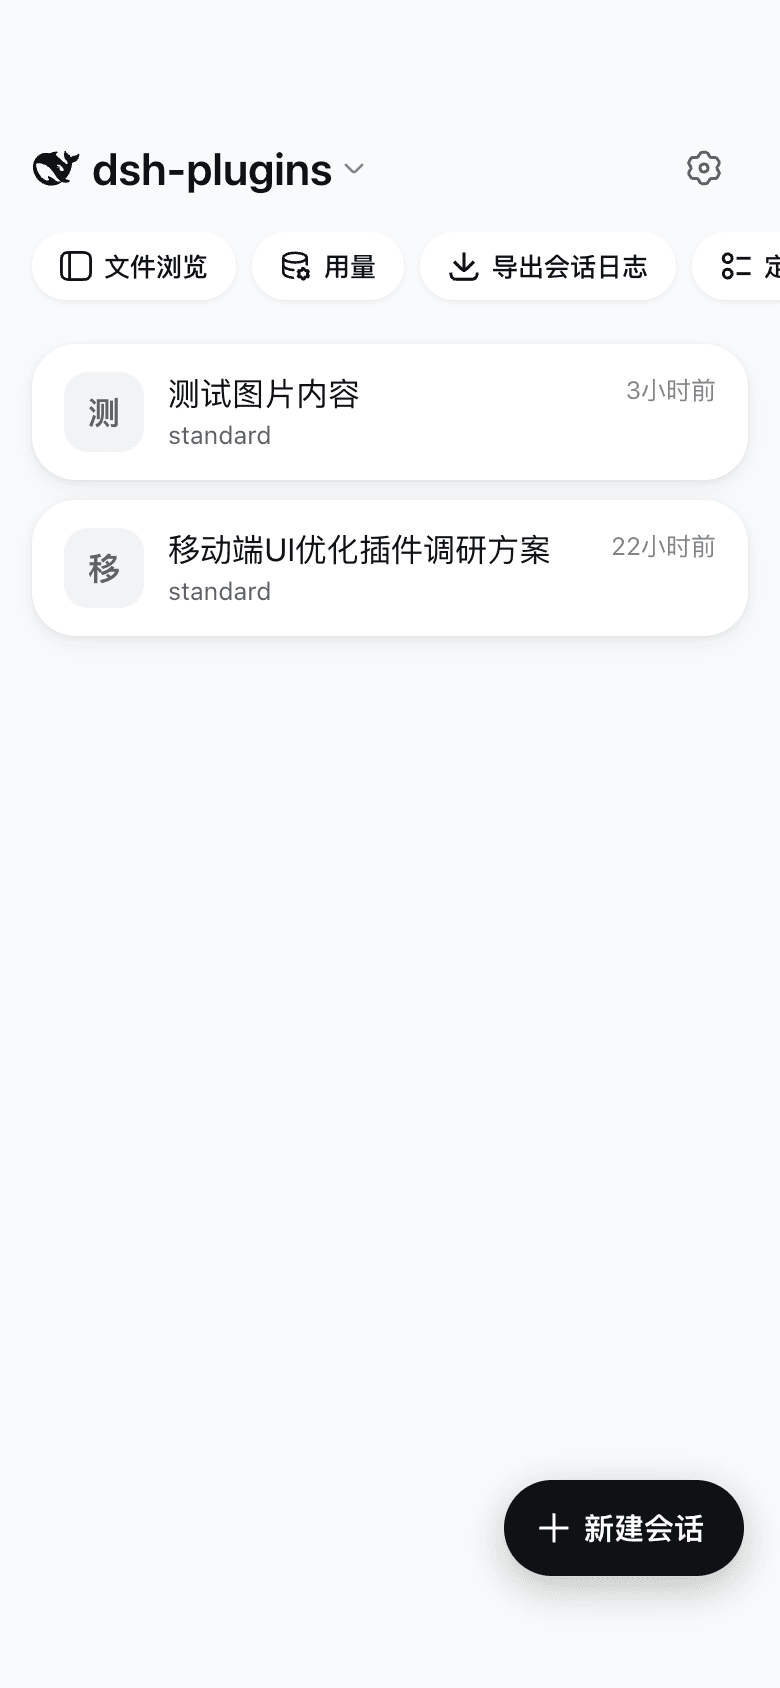
| 会话列表主屏 | 会话页 | 会话信息卡 |
|---|---|---|
| composer 权限 sheet | 公网设备看到的配对页 |
|---|---|
截图为 390×844 手机视口、浅色主题;深浅主题均适配。配对页是网关自绘页面,固定深色设计。
安装
dsh plugin add dsh-zen-remote
装完重启 dsh web,手机界面与网关一起生效,不需要再手写任何配置行。
兼容性:在 DSH
0.1.1-rc.2(web profile)上开发并实测,最后验证 2026-08-22。
卸载:dsh plugin remove dsh-zen-remote(或从 profile 的 dependencies 与 bundles 里删掉那两行),重启 dsh web 即恢复原状;要清掉配对数据再删 ~/.dsh/lan-gate-state.json 与 ~/.dsh/lan-gate.config.json。
手动写法 / 本地开发
手动改 ~/.dsh/profiles/web/package.json——dependencies 一行、bundles 一行:
{
  "dependencies": {
    "dsh-zen-remote": "^1.1.6"        // 本地开发换成 "link:/path/to/dsh-zen-remote"
  },
  "dsh": { "profile": { "bundles": [
    "@deepseek-ai/dsh-base",
    "@deepseek-ai/dsh-web-app",
    "dsh-zen-remote"
  ] } }
}
cd ~/.dsh/profiles/web && pnpm install
# 重启 dsh web
不想走 profile 安装流程的静态挂载写法见 cordis.patch.yml.example。
配置公网访问
装完在本机 127.0.0.1:3080 就能用手机界面。要从外面访问,按下面三步走。
1. 配一个反代中继 HTTPS
网关默认只监听 127.0.0.1:3088,必须由你自己的反代对外。家宽没有公网 IP、或者不想开路由器端口,就跳过 nginx/Caddy 直接看第三个块(Cloudflare Tunnel)。
<b>nginx</b>
# http {} 块里加一次
map $http_upgrade $connection_upgrade { default upgrade; '' close; }

server {
    listen 443 ssl http2;
    server_name dsh.example.com;

    ssl_certificate     /etc/letsencrypt/live/dsh.example.com/fullchain.pem;
    ssl_certificate_key /etc/letsencrypt/live/dsh.example.com/privkey.pem;

    location / {
        proxy_pass http://127.0.0.1:3088;
        proxy_http_version 1.1;

        proxy_set_header Upgrade $http_upgrade;
        proxy_set_header Connection $connection_upgrade;

        proxy_set_header Host $host;
        proxy_set_header X-Forwarded-For $proxy_add_x_forwarded_for;
        proxy_set_header X-Forwarded-Proto $scheme;

        proxy_buffering off;
        proxy_read_timeout 3600s;
    }
}
<b>Caddy</b>
dsh.example.com {
    reverse_proxy 127.0.0.1:3088
}
<b>没有公网 IP?用 Cloudflare Tunnel</b>
家宽拿不到公网 IP、或者不想在路由器上开端口时用这个:cloudflared 从你这台机器主动连出去,Cloudflare 那边负责域名、证书和入口,路由器一个端口都不用开。免费版够用。
前置:域名托管在 Cloudflare(NS 指过去)。
-
打开 Zero Trust 控制台 → Networks → Tunnels → Create a tunnel → 选 Cloudflared,起个名字,创建后页面会给你一条带 token 的安装命令;
-
在跑 DSH 的这台机器上执行那条命令(就是下面这个形状,token 用页面给的):
# macOS / Linux:装成常驻服务,开机自启 cloudflared service install eyJhIjoi...你的token -
回到隧道详情页 → Public Hostname → Add a public hostname:
字段 填什么 Subdomain / Domain dsh/example.com(即dsh.example.com)Service Type HTTPURL 127.0.0.1:3088保存后
https://dsh.example.com就通了,证书 Cloudflare 自动签。网关的LAN_GATE_HOST保持默认127.0.0.1即可——cloudflared就在本机。
装完必须做第 2 步的 403 自检,这一步对隧道尤其要紧:cloudflared 和网关走的是本机回环连接,网关区分「公网访客」和「坐在这台电脑前的你」,全靠隧道有没有带上 X-Forwarded-For。cloudflared 默认是带的,所以配对墙正常生效;但万一你的版本或配置把它去掉了,公网请求就会被当成本机管理员,配对墙形同虚设——用手机流量访问 /lan-gate/admin,看到 403 才算安全。
提示:不用设
LAN_GATE_TRUSTED_PROXIES——网关本来就把回环来的连接当作可信反代,填127.0.0.1是空操作,也不能替代上面那个自检。Cloudflare 免费版支持 WebSocket(DSH 对话流需要),单个请求体上限 100MB,高于本插件默认的 20MB 上传上限,不影响使用。
…